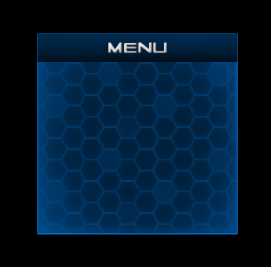
If you want to make a panel or window that can be moved around when by the user via their mouse, NGUI makes it extremely simple. We're going to do it in a matter of minutes, and without writing a single line of code to boot!
Let's say you've got a nifty menu window that you want your user to be able to move around. I've used the SciFi example atlases that NGUI comes with to create a simple little window made up of some sprites and a label. It doesn't matter exactly what you use.
I have made all of these elements children of a panel (NGUI > Create > Panel), so that when the panel moves, it all moves.
After we make the window that we want to drag around, we need to add a Collider to the element the user needs to click to drag the menu around. In our example, we want to be able to drag the title bar (the background to the word "MENU") and have the rest of the elements follow. In the example above, it's the "Title Bar" sprite. Add a Box Collider to that element, and resize it so that it's the same size as the element you want the user to click to drag.
Now, there's just one script left to add. It's found in your Project view under "NGUI > Scripts > Interaction." It's called "UIDragObject". Drag that script right on to the object you added your collider to. Click on that object, and scroll down to the settings for the "UIDrag Object (Script)" component in the Inspector.
Notice that the "Target" parameter is not set. We need to tell the script what object we want to move when the user drags their mouse around. In our case, we're going to drag the "Panel" object -- the parent of all the menu objects -- from the Hierarchy to this parameter.
That's all there is to it. Run your scene, grab the title bar, and drag your menu around!
Tuesday, February 11, 2014
Monday, February 3, 2014
Unity 3D: How to Post to Twitter from your Unity Game
Nobody can deny the power of social media in building an audience for your game. I'm going to be writing a few posts detailing the simplest ways I know of for sharing your game via some popular social media sites; today, I'm going to focus on Twitter.
I create almost all of my buttons with NGUI. If you're not using it, I've written a very simple post on getting started with it. If you're using NGUI, you'll call the ShareToTwitter () method in the OnClick () method of the button of your choice, passing in the text you'd like to share. Regardless, you just need to call this method with the text that you'd like to share, hashtags and all.
private const string TWITTER_ADDRESS = "http://twitter.com/intent/tweet";
private const string TWEET_LANGUAGE = "en";
void ShareToTwitter (string textToDisplay)
{
Application.OpenURL(TWITTER_ADDRESS +
"?text=" + WWW.EscapeURL(textToDisplay) +
"&lang=" + WWW.EscapeURL(TWEET_LANGUAGE));
}
So what are we doing here? Well, we're opening a URL, which in this case is the URL that Twitter uses to allow us to post to our account. On a PC, this will open the browser and attempt to post Twitter the textToDisplay parameter. On mobile devices, this will open the Twitter app or the browser, depending on what the user has.
You can build up the textToDisplay parameter however you like; just remember the 140-character limit. Include hashtags, a link, your score, whatever.
Subscribe to:
Posts (Atom)


